
Mastering the Art of Sourdough Baking
What is the Process of Sourdough Fermentation?

How To Bake A Sourdough Loaf At Home: Sourdough fermentation is an intriguing culinary process in which wild yeasts and beneficial bacteria work harmoniously to create natural leavening. This remarkable fermentation process typically takes 24 to 48 hours, allowing the dough to rise while developing a delightful tangy flavour and enhancing digestibility. The outcome is a loaf that not only tantalises the taste buds but also offers improved texture and nutritional benefits.
Engaging in the craft of sourdough baking allows you to embrace a method deeply rooted in both tradition and science, harnessing the natural elements to transform basic ingredients into a culinary masterpiece. Each loaf becomes a testament to your dedication and expertise, as you witness the fermentation process unfold, culminating in a bread that is both nourishing and utterly delightful.
What Are the Key Characteristics of a Healthy Sourdough Starter?
A vigorous sourdough starter is the foundation of successful sourdough baking. Maintaining a healthy starter requires regular feedings of flour and water to keep it thriving. You can monitor its progress by observing the following signs:
- Bubbles forming on the surface
- A pleasant, slightly tangy aroma
- Doubling in size after feeding
- A thick and smooth consistency
These indicators confirm that your starter is active and primed to leaven your bread. With consistent care and attention, you will cultivate a reliable starter that produces beautiful loaves, offering a gratifying baking experience for any home baker.
What Are the Benefits of Baking Homemade Sourdough?
Baking sourdough at home gives you unparalleled control over your ingredients, resulting in fresher, more personalised bread. The fermentation process not only enriches flavour but also presents potential health benefits, such as improved gut health. Participating in sourdough baking becomes a fulfilling kitchen activity that appeals to bakers of all skill levels, allowing you to experiment and innovate as you refine your craft.
Moreover, the satisfaction derived from crafting your own bread extends beyond taste; it nurtures creativity and fosters a deeper connection to the food you consume. Each loaf becomes a canvas for your culinary expressions, making baking a rewarding journey that enriches both body and soul.
What Are the Basic Ingredients Needed for Sourdough Bread?
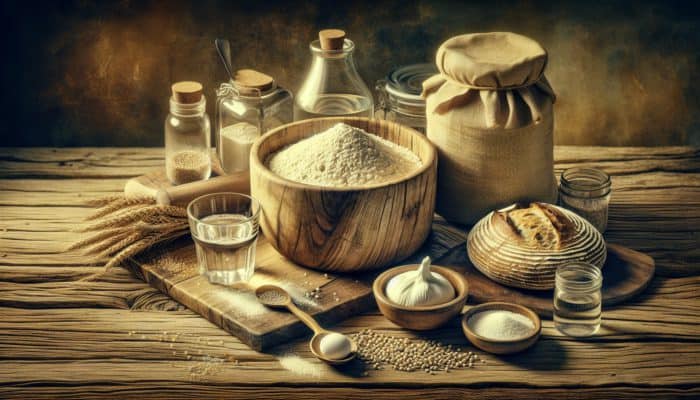
The cornerstone of successful sourdough bread lies in its essential ingredients: flour, water, salt, and a vibrant starter. When selecting flour, consider local stone-ground varieties, which significantly enhance the loaf's flavour and texture. The quality of your water is crucial to the fermentation process, as it directly affects yeast activity and the overall quality of your bread. Additionally, salt plays multiple roles: it regulates yeast activity and adds essential flavour, ensuring your loaf is both balanced and nutritious.
By focusing on these fundamental ingredients, you lay the groundwork for exceptional sourdough. Each component plays a vital role, resulting in a loaf that not only satisfies your palate but also delivers substantial nutritional benefits, making every bit of effort worthwhile.
What Are the Simple Steps to Bake Sourdough Bread?
Baking your first sourdough loaf may seem intimidating; however, the process is straightforward and immensely rewarding. Start by combining your active starter with flour, water, and salt to form a cohesive dough. Allow this mixture to undergo bulk fermentation for several hours, during which it will expand and develop flavour.
Following fermentation, shape the dough into your desired form and allow it to proof, which is essential for creating the airy crumb and crispy crust that are hallmarks of sourdough bread. Finally, bake your loaf in a preheated oven to achieve that perfect texture. This process not only yields delicious bread but also cultivates essential baking skills, making it a pleasurable experience for novice bakers.
Collecting Your Essential Ingredients for Sourdough
What Types of Flour Work Best for Sourdough Baking?
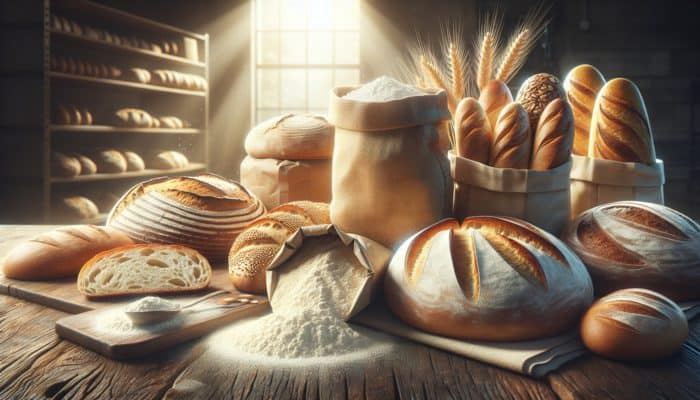
The flour you choose significantly affects the structure and flavour of your sourdough loaf. Choose high-quality options, such as all-purpose, bread, or whole-grain flour, to achieve the ideal crust and crumb. While all-purpose flour offers versatility, bread flour, with its higher protein content, provides a chewier texture that is perfect for sourdough.
Whole grain flours, such as whole wheat or spelt, can contribute a rich, nutty flavour to your loaf. Choosing the right flour not only enhances the taste of your bread but also influences its performance during fermentation and shaping. Be mindful of the local availability of these flours, and don’t hesitate to experiment to find the perfect match for your baking style.
How Much Water Should You Incorporate?
Measuring water accurately is critical in sourdough baking, as it directly affects the dough's hydration and overall texture. Proper hydration ensures that your dough is neither too sticky nor too dry, both of which can impede successful fermentation and shaping. Generally, a hydration level of around 70% is an excellent starting point for sourdough, but feel free to adjust based on the flour you are using and the loaf characteristics you desire.
To achieve the correct consistency, pay attention to the dough's feel during mixing. Your dough should be tacky yet manageable, allowing you to knead or fold it without excessive stickiness. Mastering water content improves fermentation outcomes, ultimately enhancing the flavour and structure of your baked bread.
How and Why to Add Salt and Other Ingredients?
Adding salt to your sourdough not only enhances its flavour but also strengthens the dough, resulting in a more robust loaf. The correct amount of salt is essential because it regulates yeast activity and contributes to overall taste. A general guideline is to aim for around 2% of the total flour weight in salt for optimal results.
In addition to salt, consider incorporating optional elements such as seeds, herbs, or spices to elevate both nutrition and flavour. These additions allow you to personalise your sourdough, making it distinctly yours. Maintaining precise measurements ensures a balanced outcome, enabling you to create delicious variations while preserving the integrity of your dough throughout the baking process.
What Essential Tools Do You Need for Sourdough Baking?
What Kitchen Equipment Is Necessary for Starters?
To embark on your sourdough journey, it is essential to have basic kitchen equipment to simplify the baking process. Fundamental items such as a mixing bowl, a proofing basket (banneton), and a digital kitchen scale are vital. The mixing bowl serves as your primary workspace, enabling efficient ingredient mixing.
A proofing basket is crucial for shaping the dough and providing support during the final rise, ensuring the desired loaf shape is achieved. A digital kitchen scale guarantees accurate measurements, which are critical for successful sourdough baking. With these essential tools at your disposal, you can approach home baking with confidence, even without advanced equipment.
How to Choose the Right Baking Vessel for Sourdough?
Choosing the appropriate baking vessel significantly influences the heat distribution and crust formation of your sourdough loaf. A Dutch oven is highly recommended for its ability to trap steam, promoting a crispy crust and beautiful oven spring. When selecting a vessel, consider both its durability and size to ensure it meets your baking requirements.
If you do not have a Dutch oven, a baking stone, or a heavy-duty baking tray, it can also yield excellent results. Preheating your vessel is crucial, as it helps form the desired crust while providing an even baking environment. Making informed decisions about your baking vessel can enhance your sourdough outcomes, ensuring each loaf reflects your dedication and skills.
How to Properly Maintain Your Baking Tools?
Proper maintenance of your baking tools is essential for ensuring their longevity and hygiene. Regular cleaning and appropriate storage practices prevent contamination, which is vital for both health and the quality of your baked goods. After each use, thoroughly wash your mixing bowls and utensils with warm, soapy water to eliminate any residues.
For proofing baskets, ensure they are completely dried to prevent mould growth. Store your equipment in a clean, dry location to maintain its integrity. By implementing these straightforward practices, you keep your tools in prime condition, contributing to successful sourdough baking experiences time and again.
Expert Insights on Baking a Sourdough Loaf at Home
How Does Dough Handling Affect Sourdough Baking Results?
Your approach to handling dough is a critical factor in achieving desirable outcomes in your sourdough baking. Proper techniques, such as gentle folding, help strengthen the gluten structure, which is essential for supporting the loaf during fermentation and baking. Common pitfalls include overworking the dough or being too rough during shaping, which can lead to a dense final product.
To avoid these issues, practice gentle handling that allows the dough to retain its gas bubbles, which are crucial for achieving the distinctive oven spring. Please pay attention to the texture and feel of your dough as you work with it, embracing the art of sourdough baking to elevate your skills. Mastering dough handling improves oven spring and texture, enhancing the overall quality of your finished loaf.
What Advanced Shaping Techniques Can You Try?
Shaping dough is an advanced skill that can dramatically influence the appearance and texture of your sourdough loaf. Creating tension in the dough is vital, as it helps maintain its shape during the final proofing and improves structure. To achieve this, practice various shaping techniques such as the “letter fold” or “boule” method to sharpen your skills.
As you gain confidence in shaping, focus on maintaining a taut outer surface to achieve a professional-looking loaf. This process requires practice and patience, but the rewards are well worth the effort. Exploring these advanced shaping methods will elevate your sourdough baking, allowing you to express your creativity and technical skill in each bake.
What Are the Common Issues to Troubleshoot in Sourdough Baking?
When baking sourdough, various challenges may arise, particularly concerning fermentation and rising. If your dough fails to rise, consider examining fermentation conditions such as temperature and humidity. Adjust your environment to keep it warm and stable to support effective yeast activity.
Utilising fresh ingredients, particularly your starter, is pivotal to consistent results. If you encounter issues, do not hesitate to troubleshoot by adjusting your techniques or processes to achieve the best possible results. Remember, each baking experience imparts valuable lessons, ultimately leading to a more successful sourdough journey.
What Is the Proper Way to Ferment the Dough?
What Is the Ideal Temperature Range for Fermentation?
The optimal temperature range for sourdough fermentation typically falls between 20 and 25 degrees Celsius. This warm environment effectively activates yeast, enabling optimal flavour development without the risk of over-proofing your dough. Monitoring temperature is crucial, as it directly affects fermentation rate and the overall outcome of your loaf.
Using a thermometer helps you maintain these conditions, ensuring your dough rises properly while developing the complex flavours characteristic of sourdough. By establishing an ideal fermentation environment, you set the stage for success, culminating in beautifully baked bread that showcases your skills and dedication.
What Are the Signs of Successful Fermentation?
Recognising successful fermentation is crucial for timing your sourdough for baking. Look for visual cues that indicate your dough is ready, including a doubled volume and a bubbly surface. These signs indicate yeast activity and gas production in the dough, signalling that it's time to proceed to the next stage.
- Doubled in size
- Bubbles forming on the surface
- A pleasant aroma, slightly tangy
- A domed appearance rather than a flat surface
By identifying these indicators, you can confidently proceed to shape and bake your dough, ensuring a successful sourdough experience that delights the senses and impresses all who taste it.
How Long Should You Allow the Dough to Rest?
Allowing your dough to rest is a critical step in the sourdough process, enabling flavours to mature and the gluten structure to relax. The duration of this resting period varies, typically several hours, depending on your environment and the specific recipe. A well-timed rest permits the dough to rise, developing those sought-after characteristics that define quality sourdough.
During this time, the yeast continues to work, enhancing the bread's complexity and overall flavour. Balancing the resting period with fermentation ensures that your sourdough maintains its integrity and delivers a delightful eating experience. As you gain experience, you'll learn to gauge the right length of time for optimal results.
How to Troubleshoot Common Fermentation Issues?
When fermentation does not go as planned, identifying the underlying issues is crucial for success. Common problems include improper yeast activation or incorrect humidity levels. Start by ensuring that your starter is fresh and active, as this is the foundation of your fermentation.
Adjust your environment to maintain a stable temperature and appropriate humidity to encourage yeast activity. If your dough is fermenting slowly, consider moving it to a warmer location. By addressing these factors, you can troubleshoot effectively, leading to a successful rise and a delicious loaf that reflects your efforts.
Research-Backed Benefits of Baking Sourdough at Home
How Does Sourdough Improve Digestion?
The unique fermentation process of sourdough can significantly enhance digestion for many individuals. During fermentation, gluten is broken down, potentially making it easier to digest than commercial breads. This is particularly beneficial for those with gluten sensitivities, as the pre-digestion process may alleviate discomfort.
Many home bakers report improved digestive experiences with sourdough, leading to a more enjoyable eating experience. This traditional baking method not only yields a delicious product but also promotes gut health, making it a popular choice for those seeking to enhance their wellbeing through food.
What Are the Nutritional Advantages of Sourdough Baking?
Baking sourdough with natural starters enhances nutrient absorption, particularly the bioavailability of essential minerals. This process improves nutrient extraction from grains, making the bread not only delicious but also more nutritious. The whole-wheat process breaks down phytates, compounds that can inhibit mineral absorption, thereby enhancing the loaf's overall nutritional profile.
By opting for homemade sourdough, you support your health while indulging in a delightful culinary experience. This approach to bread-making emphasises the significance of quality ingredients and traditional techniques, fostering a deeper connection between you and the food you consume.
What Are the Long-Term Rewards of Regular Sourdough Baking?
Engaging in regular sourdough baking offers a plethora of long-term benefits, from skill development to enhanced mental well-being. As you practice, your baking skills improve, allowing you to master the nuances of fermentation, shaping, and baking techniques. This consistent practice not only yields fresh bread but also fosters mindfulness and creativity in the kitchen.
Additionally, regular baking can yield cost savings compared with purchasing high-quality well-being breads from bakeries. With each loaf, you cultivate a sense of achievement and connection to the food you share with loved ones. The rewards of baking sourdough extend beyond mere bread; they enrich your life, one loaf at a time.
What Are the Common Mistakes to Avoid in Sourdough Baking?
What Causes Overproofing in Dough?
Overproofing is a common pitfall in sourdough baking, resulting in a loaf that collapses during baking. Proofing the dough for too long weakens the gluten structure, compromising the final rise. To avoid this, be vigilant for early signs, such as excessive bubbling or a noticeable loss of volume.
Understanding the timing for proofing can significantly influence the quality of your sourdough. It is essential to gauge when your dough is ready, ensuring it retains its shape and rises beautifully during baking. Mastering this aspect results in more consistent, successful sourdough loaves.
How to Prevent a Dense Sourdough Loaf?
A dense sourdough loaf can be disheartening, but it is often preventable with careful attention to hydration and kneading techniques. Ensuring proper hydration is critical, as it directly affects the dough's ability to rise. If your dough appears too dry, gradually add water until it reaches a workable consistency.
Moreover, kneading or folding the dough sufficiently develops gluten, which is essential for achieving a lighter, airier loaf. Please pay close attention to the dough's texture while working with it, and make necessary adjustments to prevent density. By employing mindful techniques, you can create a beautifully textured loaf that delights the palate.
What Happens When You Ignore the Resting Phase?
Neglecting the resting phase in sourdough baking can lead to poor flavour and texture. This step is vital for allowing the dough to develop its character, as fermentation continues even during rest. Always allocate sufficient time for the dough to rest between stages to ensure enhanced flavour and improved texture.
By embracing the significance of this phase, you create the conditions for a more delicious and well-structured loaf. Each moment invested in the resting process contributes to the overall quality of your sourdough, ultimately elevating your baking experience.
Baking and Cooling Your Sourdough Loaf
How to Preheat Your Oven Correctly?
Achieving the right oven temperature is crucial for baking sourdough, as it ensures a crispy crust and even cooking. Preheating your oven thoroughly before placing your loaf inside ensures optimal heat distribution, preventing underbaking that can compromise the loaf's quality. Aim for a temperature of approximately 230 degrees Celsius for optimal results.
Consider using an oven thermometer to verify your oven's accuracy, as many home ovens can deviate by several degrees. This attention to detail helps guarantee that your sourdough bakes evenly and develops the signature crust that makes it so desirable. With proper preheating, your baking will yield stunning results, showcasing your hard work and skill.
What Are the Best Techniques for Scoring Dough?
Scoring your dough before baking is an essential technique that allows for even expansion and enhances the aesthetic appeal of your sourdough. Using a sharp blade, make shallow cuts in your loaf to create patterns that not only enhance visual appeal but also help control the rise's direction during baking.
Experiment with different scoring designs to discover your signature style. This step is not solely decorative; it enables the dough to expand properly, preventing unsightly eruptions during baking. By mastering the art of scoring, you'll enhance both the appearance and performance of your sourdough loaves, impressing anyone who has the pleasure of tasting them.
What Are Effective Cooling Techniques for Sourdough?
After baking, allowing your sourdough loaf to cool properly is essential for preserving its texture and crust integrity. Placing the loaf on a wire rack prevents it from becoming soggy, ensuring that the crust remains crisp and enjoyable. Cooling for at least an hour before slicing allows the crumb to set and flavours to develop fully.
By resisting the urge to cut into your loaf too soon, you reward yourself with a superior eating experience. The cooling process is a crucial step that enhances the overall quality of your sourdough, culminating in a loaf that is not only visually appealing but also delicious.
What Are the Best Practices for Storing Your Sourdough?
What Are the Proper Wrapping Methods for Sourdough?
To maintain the freshness of your sourdough, it is imperative to utilise proper wrapping methods. Use breathable materials, such as cloth or paper bags, to retain moisture without promoting mould growth. Avoid plastic wrap, as it traps moisture and can lead to soggy bread.
By wrapping your loaf appropriately, you extend its shelf life, allowing you to savour your homemade bread for days to come. Storing your sourdough in a cool, dry place further enhances its longevity, ensuring that each slice remains as delightful as the first.
How Long Does Sourdough Stay Fresh?
The freshness of your sourdough can vary based on storage conditions. Typically, it remains fresh for 2 to 3 days at room temperature when wrapped correctly. For longer preservation, freezing is an excellent option, allowing you to enjoy homemade bread at your convenience.
When freezing, slice the loaf beforehand for easy access and quick reheating. This method guarantees that you always have delicious sourdough on hand, ready to complement any meal or occasion. With proper storage techniques, your sourdough can deliver lasting enjoyment, making every baking effort worthwhile.
What Tips Can Help Revive Stale Bread?
Stale sourdough need not be discarded; there are simple techniques to revive older loaves. Toasting slices can restore their crunch, making them ideal for sandwiches or as a base for toppings. Alternatively, briefly steaming the loaf can restore its moisture, making it more palatable.
These methods help you maximise your baking efforts, ensuring every loaf is appreciated as it ages. Embracing these reviving techniques enhances your sourdough experience, ensuring that not a crumb goes to waste.
Frequently Asked Questions (FAQs)
Can Whole Grain Flour Be Used for Sourdough Baking?
Yes, whole-grain flour can be an excellent choice for sourdough baking. It imparts a richer flavour and additional nutrients, but may require adjustments in hydration levels due to its absorbency.
How Can I Tell if My Sourdough Starter Is Ready?
Your sourdough starter is ready when it has doubled in size, exhibits bubbles on the surface, and has a pleasant, tangy aroma.
Is It Possible to Bake Sourdough Without a Dutch Oven?
Absolutely! You can bake sourdough without a Dutch oven by using a baking stone or a heavy-duty baking tray, though the crust may not be as crispy.
What Should I Do If My Dough Isn't Rising?
If your dough isn't rising, check the freshness of your starter, the ambient temperature, and ensure proper hydration for successful fermentation.
How Can I Enhance the Flavour of My Sourdough?
Consider enhancing the flavour of your sourdough by adding ingredients such as seeds, herbs, or spices, and allowing longer fermentation times for depth.
Is It Acceptable to Refrigerate Sourdough Dough?
Yes, you can refrigerate sourdough dough to slow down fermentation, which can enhance flavour. Please ensure you shape it after refrigerating.
What Temperature Should My Oven Be for Baking Sourdough?
Preheat your oven to around 230 degrees Celsius for optimal baking results, ensuring a crispy crust and good oven spring.
How Long Should I Allow My Sourdough to Cool?
Allow your sourdough to cool on a wire rack for at least an hour to set the crumb and preserve the crust's integrity.
Can I Use Tap Water for My Sourdough?
Yes, tap water can be used for your sourdough, but ensure it is free of chlorine and other impurities that may negatively affect yeast activity.
How Should I Store Leftover Sourdough?
Store leftover sourdough in a breathable wrap at room temperature for 2-3 days, or freeze it for longer storage to ensure it remains fresh and enjoyable.


I love how you’ve highlighted the balance of tradition and science in sourdough baking! It’s fascinating how each loaf reflects not just our skills but also the unique environment we create for the fermentation process. I found that experimenting with different local flours can really change the bread’s character, adding layers of flavor that are surprisingly profound.