
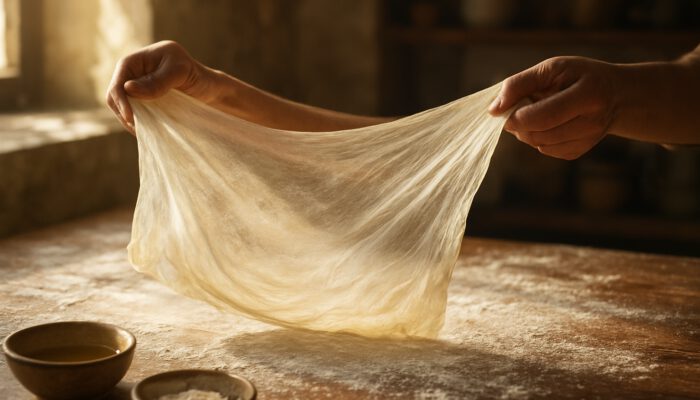
Choosing Premium Ingredients for Perfect Filo Pastry
Identifying the Best Flour for Filo Pastry
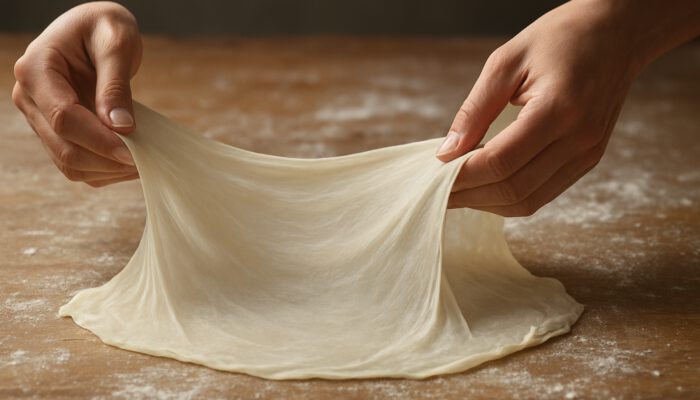
The secret to outstanding filo pastry starts with selecting the ideal flour. Plain flour with a protein content ranging from 10-12% is preferred, as it provides sufficient strength without making the dough overly firm. Achieving this balance is critical for creating that light, paper-thin texture that everyone adores. When rolling out the dough, the suitable flour allows it to stretch smoothly without tearing, ensuring that each delicate layer stays intact.
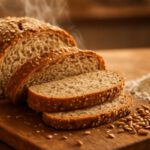
In Australia, reputable brands like White Wings or local artisanal flours are excellent choices. Opt for finely milled flour, as it will lead to a smoother final dough. The quality of flour significantly impacts your end product, so investing in a reputable brand is worthwhile. If you’re feeling experimental, try blending in a bit of wholemeal flour for an extra layer of flavour.
Remember to sift your flour before measuring it. This process aerates the flour and reduces lumps, making it easier to mix into your dough. A well-prepared flour base is essential for crafting beautiful homemade filo pastry.
Exploring Different Fat Choices for Filo Pastry
The type of fat you choose is equally vital in the filo pastry-making process. Unsalted butter is a popular option due to its rich flavour and ability to create flaky layers. neutral oils such as sunflower or canola can also yield excellent results. Butter contributes a depth of flavour that enhances both sweet and savoury fillings, while oil can create a lighter texture that some may prefer.
When using butter, melt it and allow it to cool slightly before applying it to the dough. This step prevents the dough from becoming excessively greasy, which could lead to soggy layers. If you choose oil, apply it sparingly between the dough sheets to avoid overpowering the pastry’s flavour. Each layer should be brushed lightly to ensure they separate beautifully during baking.
Some recipes recommend a combination of butter and oil for the best of both worlds: the flavour of butter and the crispness of oil. Experimenting with different fats can yield unique results, so feel free to explore what suits your taste buds best.
Choosing Fresh Eggs and Liquids for Optimal Dough
Fresh eggs are crucial for binding the ingredients and enhancing the dough’s elasticity. This elasticity allows the dough to be stretched thinly without breaking. When preparing filo pastry, opt for large eggs and ensure they are at room temperature for the best mixing results.
Besides eggs, the type of liquid you use is also critical. Water is a common choice, but milk can add richness and flavour. For a unique twist, consider adding a splash of vinegar or lemon juice to the liquid to boost the dough’s elasticity. This small addition can significantly affect the final texture of your pastry.
When sourcing your ingredients, choose free-range or organic eggs whenever possible. They often offer superior flavour and represent a more ethical choice. Fresh ingredients are essential for achieving the best results, so take the time to select quality products for your homemade filo pastry.
Pro Tips for Making Authentic Filo Pastry from Scratch
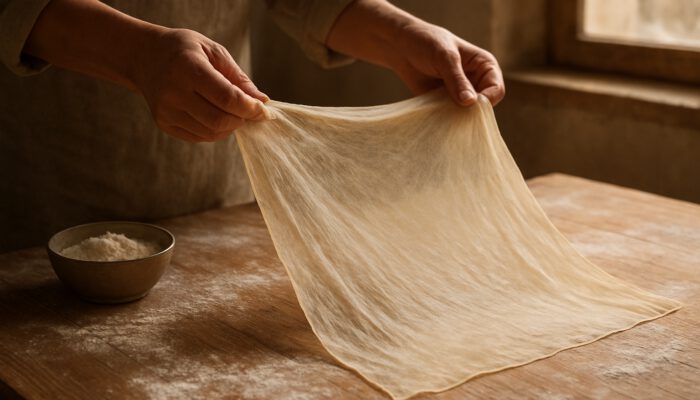
Perfecting the Initial Dough Mixing Process
Correctly mixing the dough is essential for achieving a smooth and pliable texture. Begin by combining the dry ingredients—flour and salt—in a bowl. Create a well in the centre and gradually add your eggs and liquid. This technique prevents lumps and ensures an even mixture.
While mixing, use your hands or a wooden spoon to incorporate the flour into the liquid. Aim to form a shaggy dough that holds together but isn’t overly sticky. Once combined, transfer the dough to a lightly floured surface and knead gently for about 5-10 minutes. This process helps develop the gluten, providing the dough with the necessary strength.
After kneading, wrap the dough in cling film and let it rest for at least 30 minutes. This resting phase allows the gluten to relax, making it easier to roll out later. Proper initial mixing is crucial for successful filo pastry, so take your time to get it right.
Understanding Dough Hydration Levels for Success
Getting the right hydration level in your dough is vital for creating pliable filo pastry. The rule of thumb is to aim for a dough that feels moist but not sticky. Excess water can lead to a soggy pastry, while insufficient moisture can make it dry and hard to work with.
Consider the humidity in your kitchen when assessing hydration. In dry conditions, you may need to add a little extra liquid, while a humid environment might require less. The dough should be soft and elastic, allowing it to stretch thinly without tearing.
During the mixing process, gradually add your liquid and closely monitor the texture. If the dough seems too wet, sprinkle in a bit more flour until you achieve the desired consistency. This careful balancing act is crucial for ensuring your homemade filo pastry turns out perfectly each time.
Avoiding Common Mixing Mistakes
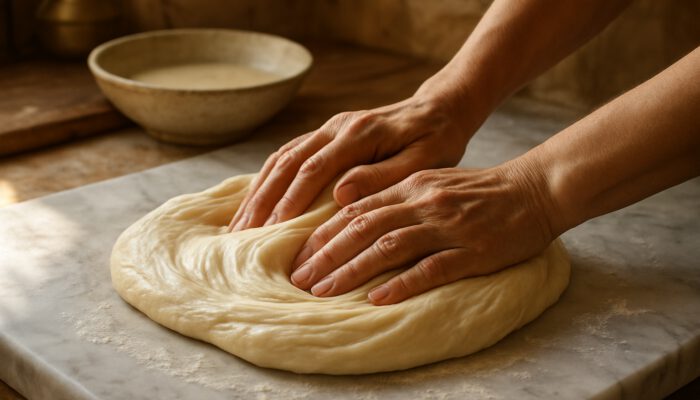
Typical mixing errors can adversely affect the quality of your filo pastry. A frequent mistake is adding all the liquid at once, which can create lumps and uneven dough. Always add your liquid gradually and mix thoroughly to achieve a smooth consistency.
Another common issue is inadequate kneading. Insufficient kneading can lead to a tough pastry that doesn’t stretch well. Ensure you knead until the dough is smooth and elastic, which typically takes around 5-10 minutes.
Lastly, don’t skip the resting phase. Allowing the dough to rest is essential for gluten relaxation, making it easier to roll out. If you find your dough springing back while rolling, it likely needs more rest. Paying attention to these early preparation habits can lead to superior homemade filo sheets with consistent texture and flavour.
How Does Proper Resting Enhance Dough Quality?
Allowing Gluten to Relax for Better Texture
Resting the dough is a vital step in the filo pastry-making process. Allowing the dough to rest helps the gluten strands relax, which is crucial for preventing shrinkage during rolling. This relaxation is what permits the dough to be stretched into those delicate layers characteristic of quality filo pastry.
Cover the dough with a damp cloth or plastic wrap while it rests to prevent it from drying out. This step is especially important in warm environments, where the dough can lose moisture rapidly. A well-rested dough will be more pliable and easier to work with, making the rolling process far more enjoyable.
After resting, the dough will feel softer and more manageable. This improved texture is essential for achieving the thinness required for perfect filo pastry. It’s a straightforward yet effective technique that can significantly elevate the quality of your final product.
Accurately Monitoring Resting Duration
The length of the resting period can greatly influence the dough’s performance. A resting time of 30 minutes is generally recommended, although this can vary based on environmental conditions. In cooler kitchens, a longer resting period may be beneficial, while warmer conditions may require less time.
Keep the dough at room temperature during this resting phase. If it’s too cold, the gluten won’t relax adequately, and if it’s too warm, the dough may become overly sticky. Use a timer to ensure you don’t forget about the dough, as even a brief rest can significantly impact the final texture.
After the resting period, check the dough for readiness. It should feel soft and slightly tacky but not overly sticky. This indicates that it’s primed for division and rolling, setting you up for success in creating your filo pastry.
Identifying Indicators for Dough Readiness
Recognising when your dough is ready for the next phase is crucial. One of the best indicators is its surface texture; it should appear smooth and slightly elastic. When gently pressed, the dough should have a slight give, signalling that it has rested sufficiently.
Another indicator is the overall feel of the dough. If it feels too firm or resistant, it likely needs additional resting time. Conversely, if it’s overly sticky, you may need to add a bit more flour before proceeding.
Lastly, observe the visual cues. The dough should be free of cracks or dry patches, which may indicate that it has been overworked or not rested enough. By paying attention to these readiness indicators, you can ensure that your dough is in optimal condition for the next steps in making filo pastry.
Effective Strategies for Making Homemade Filo Pastry from Scratch
Dividing and Covering Dough Portions Properly
Once your dough has rested, it’s time to divide it into manageable portions. Use a sharp knife or a dough cutter to slice the dough into equal balls, roughly the size of a golf ball. This uniformity ensures that each piece will roll out evenly, resulting in consistent filo sheets.
After dividing, keep the unused portions covered with a damp cloth or plastic wrap. This helps prevent them from drying out, which can complicate the rolling process. Maintaining moisture levels is crucial as you work through each piece of dough.
As you roll out each portion, ensure the other balls remain covered. This straightforward yet effective strategy helps preserve the dough’s pliability, enabling you to achieve the desired thinness without any setbacks.
Progressive Techniques for Thinning Dough
Thinning the dough to achieve that signature translucent quality is a skill that requires practice. Start by lightly flouring your work surface and rolling pin. Take one ball of dough and flatten it slightly before beginning to roll.
Begin rolling from the centre outward, applying even pressure to avoid thick spots. Rotate the dough frequently to maintain a consistent shape. Once it reaches approximately 1mm thickness, use your hands to gently stretch it further. This hand-pulling technique is what truly distinguishes homemade filo, creating those delicate layers.
As you work, remember to dust the dough lightly with flour to prevent sticking. This will also help maintain the integrity of the layers as you build them up with fat. The goal is to achieve a thin, almost transparent sheet that will bake into a wonderfully flaky pastry.
Layering Fat Evenly for Optimum Flakiness
Layering your filo pastry with fat is essential for achieving that sought-after flakiness. Once you’ve rolled out a sheet, brush it lightly with melted butter or oil before adding the next layer. This not only enhances flavour but also aids in separating the layers during baking.
Use a soft pastry brush for this task, as a gentle touch is crucial to avoid tearing the delicate dough. Apply a thin, even layer of fat, ensuring that the entire surface is coated without pooling. This technique is key to achieving each layer’s distinctive crispiness.
When stacking multiple sheets, continue this layering process. The more layers you create, the flakier your final pastry will be. It’s a straightforward yet effective method that can elevate your homemade filo to a professional standard, ensuring a delightful texture in every bite.
What Tools Facilitate the Creation of Thin Layers?
The Benefits of a Long Rolling Pin
A long rolling pin is an indispensable tool for achieving thin layers of filo pastry. Its length allows for even pressure distribution across the dough, ensuring a smooth roll without creating thick spots. Look for a rolling pin that is lightweight and easy to handle, as this will enhance your experience.
When using the rolling pin, start from the centre and roll outward, rotating the dough frequently. This technique helps maintain an even thickness and shape. If the dough begins to stick, sprinkle a little flour on the surface and the pin to keep it manageable.
Investing in a quality rolling pin can greatly improve your pastry-making experience. A good rolling pin will not only help you achieve the desired thinness but will also last for years, making it a valuable addition to your kitchen tools.
Maintaining a Clean Work Surface
Having a clean, spacious work surface is essential for effectively rolling out filo pastry. A large, lightly floured table or countertop allows you to move the dough freely without worrying about space constraints. This is especially important when you need to rotate and stretch the dough from various angles.
Before you begin, ensure your work surface is free from debris or residue that could stick to the dough. A clean surface not only aids in achieving an even thickness but also prevents unwanted flavours from transferring to your pastry.
As you roll out the dough, keep a small bowl of flour nearby for dusting. This will help maintain the right consistency and prevent sticking. A well-prepared work surface is vital for a successful filo pastry-making process, allowing you to focus on the art of creating delicate layers.
Applying Fat with Soft Brushes
Soft pastry brushes are essential for evenly applying fat between layers of filo pastry. Their gentle bristles allow for a light touch, ensuring that you don’t accidentally tear the delicate sheets. Look for brushes specifically designed for pastry, as they tend to be softer and more flexible.
When applying fat, dip the brush into the melted butter or oil and lightly sweep it across the surface of the dough. Aim for an even coating without excess accumulation, which can result in soggy layers. A delicate touch is key to preserving the pastry’s integrity.
Using a pastry brush not only helps achieve the desired texture but also enhances the flavour of the final product. Each layer brushed with care contributes to a flaky, delicious pastry that will impress anyone fortunate enough to enjoy it.
Leveraging a Pasta Machine for Precision
A pasta machine can revolutionise the process of achieving perfectly uniform thinness in filo pastry. By passing the dough through adjustable rollers, you can easily control the thickness and ensure consistent results. Start with the widest setting and gradually decrease the thickness as you continue.
This method reduces the physical exertion of rolling by hand and can save time in the process. It also minimises the risk of tearing, as the machine applies even pressure across the dough. Be sure to lightly flour the dough before feeding it through the machine to prevent sticking.
Using a pasta machine can elevate your pastry-making skills, providing professional-quality layers without the frustration of uneven rolling. It’s a worthwhile investment for anyone serious about baking and crafting delicious homemade filo pastry.
Chilling the Dough to Maintain Structure
Chilling the dough at regular intervals during the thinning process is vital for preserving the integrity of the layers. When the dough becomes too warm, the fat can start to melt, causing the layers to adhere to each other. This can hinder your ability to achieve the desired thinness.
To prevent this, place the dough in the refrigerator for about 10-15 minutes if it starts to feel too soft. This chilling period firms up the butter or oil, allowing you to continue rolling and stretching without any complications.
Keeping the dough cool not only helps maintain distinct layers but also contributes to the overall flakiness of the finished pastry. By incorporating this simple step into your routine, you’ll ensure that your homemade filo pastry turns out flawlessly every time.
Research-Based Techniques for Crafting Homemade Filo Pastry
Regularly Testing Dough Elasticity
Consistently testing the elasticity of your dough is crucial for achieving the perfect filo pastry. One effective method is to conduct gentle stretch tests during the rolling process. Take a small piece of dough and stretch it between your fingers; if it stretches easily without tearing, you’re on the right path.
If the dough resists stretching or snaps back, it may need more resting time. Allow it to sit for an additional 10-15 minutes before trying again. This testing process ensures that the dough has achieved the ideal consistency for rolling out into thin layers.
Monitoring elasticity throughout the process not only helps prevent frustration but also contributes to a superior final product. A well-prepared dough will yield beautifully thin sheets that bake into a flaky and delicious pastry.
Adapting to Environmental Factors
Environmental conditions can significantly influence the performance of your dough, particularly humidity levels. In a humid kitchen, the dough may absorb moisture from the air, making it stickier than desired. Conversely, in a dry environment, you may need to add a bit more liquid to maintain the right consistency.
To make necessary adjustments, monitor the dough’s texture as you mix. If it feels too dry, add a small amount of water or milk; if it’s too wet, sprinkle in a bit more flour. This adaptability is key to achieving consistent results, regardless of the conditions in your kitchen.
Being aware of your environment allows you to make timely adjustments, ensuring that your dough remains pliable and easy to work with. By considering these factors, you can maintain excellent dough performance and create perfect homemade filo pastry.
Evaluating Layer Separation After Baking
After baking, assessing the layer separation of your filo pastry can offer valuable insights into your technique. A well-crafted filo should display distinct, flaky layers that separate easily. If the layers merge, it may indicate that too much fat was used or that the dough wasn’t rolled thin enough.
To enhance layer separation in future bakes, consider adjusting your fat application. Make sure to use a light touch with the brush and apply an even layer between each sheet. pay close attention to the rolling process; achieving a thinner dough can lead to improved separation.
Real-life examples demonstrate that minor adjustments can yield significant improvements in the final product. By critically evaluating your results, you can refine your technique and consistently produce beautifully layered filo pastry.
Understanding the Importance of Temperature Control in Preparation
Keeping Ingredients Chilled Before Use
Temperature control is crucial when preparing filo pastry. Keeping your ingredients cool, particularly the fat, prevents premature melting during mixing and rolling. This is essential for achieving distinct layers in your pastry, as melted fat can cause the layers to merge.
Before you begin, store your butter in the fridge to keep it firm until you’re ready to melt it. If you’re using oil, ensure it’s kept in a cool location. The cooler your ingredients, the easier it will be to work with the dough, leading to better outcomes.
In warmer climates, consider working in an air-conditioned room or on a marble surface, which remains cooler than typical countertops. This simple measure can help maintain the integrity of your layers, ensuring that your homemade filo pastry is perfectly flaky.
Preventing Overheating During Handling
Overheating the dough during handling can result in a sticky, unmanageable mess. To avoid this, maintain a moderate workspace temperature and take breaks if you notice the dough becoming too soft. If needed, return the dough to the refrigerator for a brief period to firm it up.
When rolling out the dough, use a gentle touch and avoid pressing down too hard. This careful handling helps preserve the layers’ integrity and prevents the dough from becoming overly warm.
Being mindful of temperature throughout the preparation process is essential for achieving the delicate layers that define quality filo pastry. By controlling your environment and handling the dough with care, you’ll set yourself up for success.
Cooling Sheets Before Final Use
Properly cooling your filo sheets before final use is vital to avoid condensation that can compromise crispness. After rolling out and layering, let the sheets cool at room temperature before filling or baking. This step helps maintain the pastry’s texture and prevents sogginess.
If you’re working in a humid kitchen, consider placing the sheets in a cool, dry space to expedite the cooling process. Avoid stacking them while they’re still warm, as this can trap moisture and lead to an undesirable texture.
By ensuring your sheets are sufficiently cooled, you’ll enhance the overall quality of your baked pastry. This attention to detail distinguishes good homemade filo from exceptional, flaky creations that delight the taste buds.
Baking and Storing Your Homemade Filo Pastry Effectively
Correctly Preheating the Oven for Optimal Results
Preheating your oven is a fundamental step in achieving the perfect bake for your filo pastry. Set your oven to a high temperature, around 200 degrees Celsius, to encourage rapid rising and ensure a golden colour without burning the delicate layers. A hot oven creates steam, which is essential for that flaky texture.
While the oven preheats, ensure your pastry is prepared and ready to go. The longer you leave the pastry exposed to room temperature, the greater the risk of it drying out. Have your filling prepared and everything set before placing the pastry in the oven.
Once the oven reaches the desired temperature, position your pastry on the middle rack for even baking. Keep a close watch, as filo pastry can transition from perfectly golden to burnt quite rapidly. A well-preheated oven is crucial for achieving that ideal flaky result.
Safely Freezing Unused Filo Sheets
If you have leftover filo sheets, freezing them is an excellent option for future use. To freeze, wrap the unused sheets tightly in plastic wrap and lay them flat in the freezer. This method prevents them from sticking together while preserving their flexibility.
When you’re ready to use the frozen sheets, remove them from the freezer and allow them to thaw slowly in the refrigerator. This gradual thawing process helps maintain the dough’s texture and prevents excess moisture from forming, which can result in sogginess.
Properly frozen and thawed filo sheets can be just as good as freshly made, allowing you to enjoy homemade pastries at a moment’s notice. This storage method is ideal for those who love to bake but want to save time on preparation.
Determining Doneness by Visual and Tactile Cues
Determining the doneness of your filo pastry requires a keen eye and a gentle touch. Bake until the surface turns a deep golden brown and feels dry and crisp to the touch. This indicates that the interior layers have fully separated and are cooked through.
If you’re unsure, gently lift a corner of the pastry to examine its colour and texture. It should be flaky and light, not dense or doughy. A well-baked filo pastry will have a satisfying crunch when bitten into, showcasing the delicate layers you’ve worked diligently to create.
Remember to allow the pastry to cool slightly before serving. This allows the layers to firm up, enhancing the overall texture. By checking doneness carefully, you’ll ensure that your homemade filo pastry is perfectly baked every time.
Applying Melted Butter to Layers
Brushing layers with melted butter or oil is a vital step in achieving that signature flaky texture. As you layer each sheet, apply a thin coat of melted fat using a soft pastry brush. This not only adds flavour but also creates a barrier that helps keep the layers separate during baking.
Be careful not to overdo it; too much fat can lead to sogginess instead of crispiness. A light, even application is essential for achieving the desired outcome. If you notice excess fat pooling, simply use the brush to spread it out more evenly.
This technique elevates your homemade filo pastry from good to exceptional. Each layer brushed with care contributes to a beautifully flaky and delicious final product that will impress anyone who tries it.
Frequently Asked Questions
Can I incorporate wholemeal flour into my filo pastry?
Yes, you can add wholemeal flour, but it’s advisable to mix it with plain flour to maintain the desired texture. Wholemeal flour enhances flavour and nutrition but can make the dough tougher if used alone.
How long can I keep homemade filo pastry?
Homemade filo pastry can be refrigerated for up to 3 days. For longer storage, wrap and freeze it, where it can last for several months without sacrificing quality.
What’s the best method for thawing frozen filo pastry?
The ideal way to thaw frozen filo pastry is to place it in the refrigerator overnight. This gradual thawing process helps maintain its texture and prevents moisture buildup.
Can I prepare filo pastry without eggs?
Yes, you can create filo pastry without eggs. Simply replace the eggs with additional liquid, such as water or milk, to achieve the right consistency.
What types of fillings complement filo pastry best?
Filo pastry pairs beautifully with a variety of fillings, including spinach and feta, sweetened nuts, or chocolate. Just ensure the filling isn’t too wet, as this can lead to a soggy pastry.
How can I tell when my filo pastry is fully baked?
Your filo pastry is ready when it turns golden brown and feels crisp to the touch. A well-baked pastry should have distinct layers that separate easily.
Is it possible to use a food processor for making the dough?
Yes, a food processor can be used to quickly mix the dough. Just be cautious not to over-process, as this can develop the gluten too much, resulting in tougher pastry.
What’s the secret to achieving flaky layers?
The secret to flaky layers lies in using cold fat and layering it evenly between the dough sheets. This technique creates distinct layers that puff up during baking.
Can I use store-bought filo pastry instead?
Absolutely! Store-bought filo pastry is a convenient option and can save time. Just be sure to handle it carefully, as it can dry out quickly.
What should I do if my dough is excessively sticky?
If your dough is too sticky, gradually add more flour until it reaches a manageable consistency. Remember to keep your work surface lightly floured to prevent sticking.

Your insights on selecting the right flour for filo pastry wonderfully highlight the often overlooked but crucial foundation of pastry-making. I’ve always believed that the choice of ingredients directly influences the final dish, especially in delicate pastries like filo, where texture plays such a vital role.